



This guide explains a typical workflow for using Attendance Tracking and Notification (ATN) in PowerSchool SIS to identify students who have reached configured attendance thresholds, review their attendance details, record notifications, and generate letters for parents or guardians.
Before using this guide: PowerSchool navigation, report names, authentication, and letter-generation tools vary by version and district configuration. The screenshots document the original workflow and may not match the current Enhanced UI. Follow current district procedures, use only an authorized account, and confirm all settings with the PowerSchool administrator before extracting notification records.
California Truancy and Local Trigger Levels
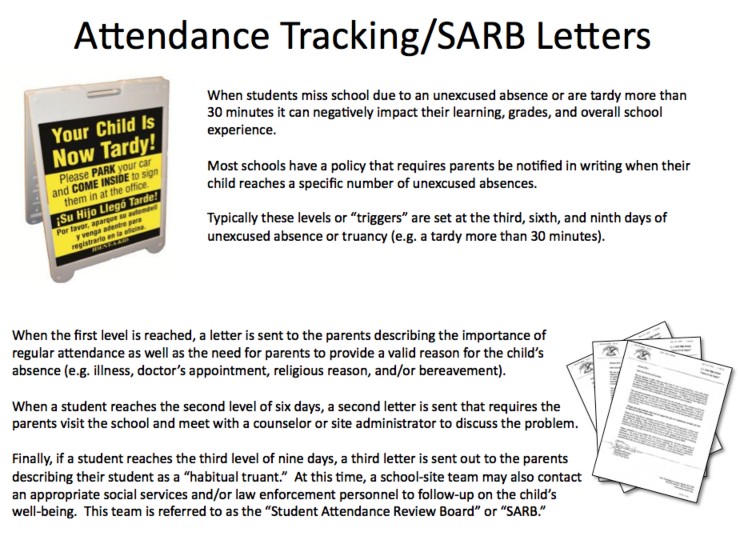
California Education Code section 48260 generally classifies a student as truant after any combination of three full-day unexcused absences or three unexcused tardies or absences of more than 30 minutes during the school day within one school year. Upon the initial classification, the district must provide the parent or guardian with the notice required by Education Code section 48260.5.
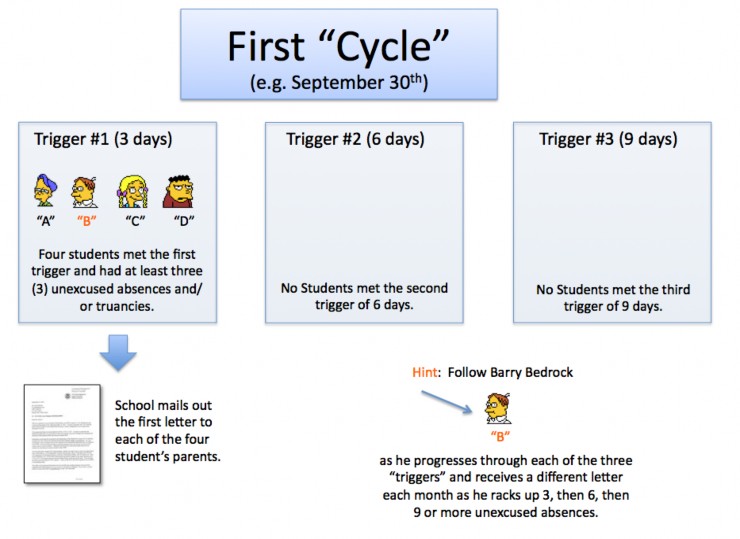
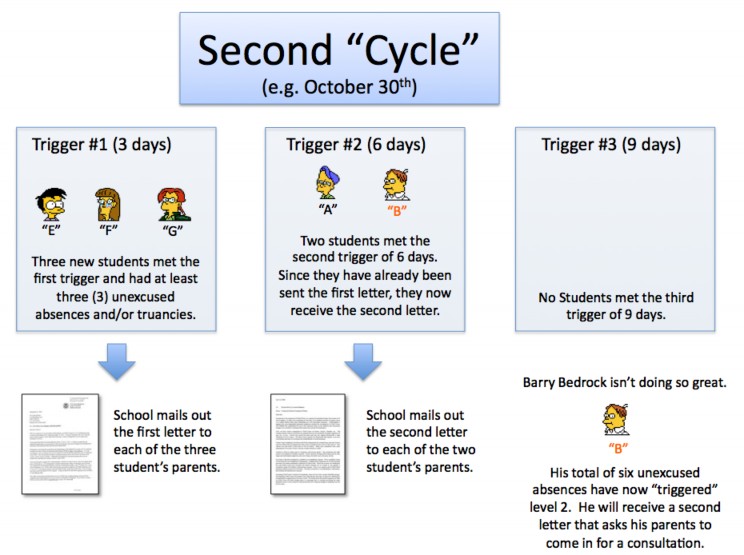
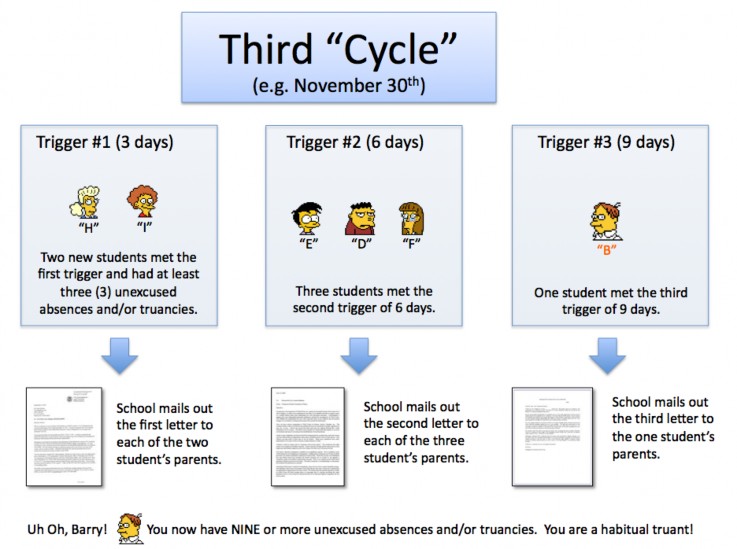
PowerSchool ATN uses district-configured thresholds and triggers. A district might configure three notification levels at 3, 6, and 9 qualifying occurrences, but those numbers should not be treated as universal legal definitions. Later notifications, conferences, habitual-truancy determinations, referrals, and supportive interventions must follow current law and the district’s adopted policies.
| Example Local Level | Example Threshold | Typical Action |
|---|---|---|
| Level 1 | 3 qualifying occurrences | Verify the record and issue the legally required initial notice when applicable. |
| Level 2 | 6 qualifying occurrences | Issue the district’s follow-up notice and arrange supportive outreach or a conference. |
| Level 3 | 9 qualifying occurrences | Issue the next approved notice and follow district procedures for additional intervention or referral. |
The 3/6/9 sequence above is an example carried forward from the original tutorial. Confirm the actual thresholds, qualifying attendance codes, attendance conversion method, and letter language configured for your district.
How ATN Works
ATN supplements the basic PowerSchool attendance setup. When attendance records meet a configured threshold, PowerSchool creates a notification record that can be used to prepare an attendance letter. Excused absences, ordinary tardies, and other attendance codes are included or excluded according to local configuration—not simply by the label visible to a user.
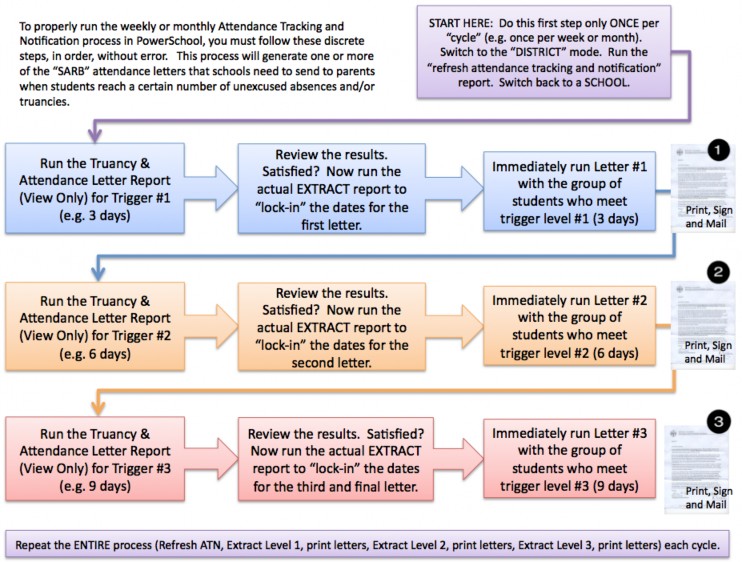
1. Refresh
At the district level, update the ATN records before running the letter reports.
2. Review
At the school level, preview students and dates before committing any notification records.
3. Extract and Notify
After verification, run the extract, generate the approved letter, and document delivery.
Overview of the PowerSchool ATN Process
Step 1: Sign In to the PowerSchool Admin Portal
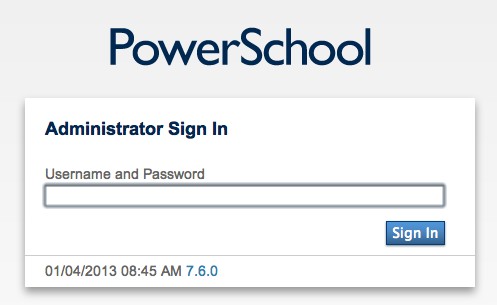
Use the current district-approved sign-in method, including single sign-on and multifactor authentication when required. Never place a password in documentation, email, notes, or an unsupported combined username-and-password format.
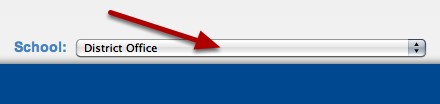
Step 2: Switch to the District Office
The refresh report must be run with adequate permissions in the district context.
Step 3: Coordinate the Refresh Cycle
Establish one responsible person or a documented schedule for the district refresh. Complete it before school staff begin that cycle’s review and extraction work. Avoid rerunning it during an active cycle unless the PowerSchool administrator has determined that a rerun is necessary and has assessed the effect on pending records.
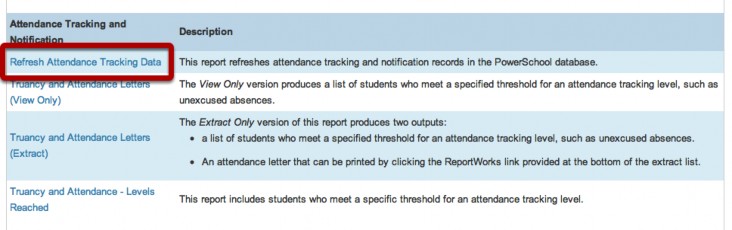
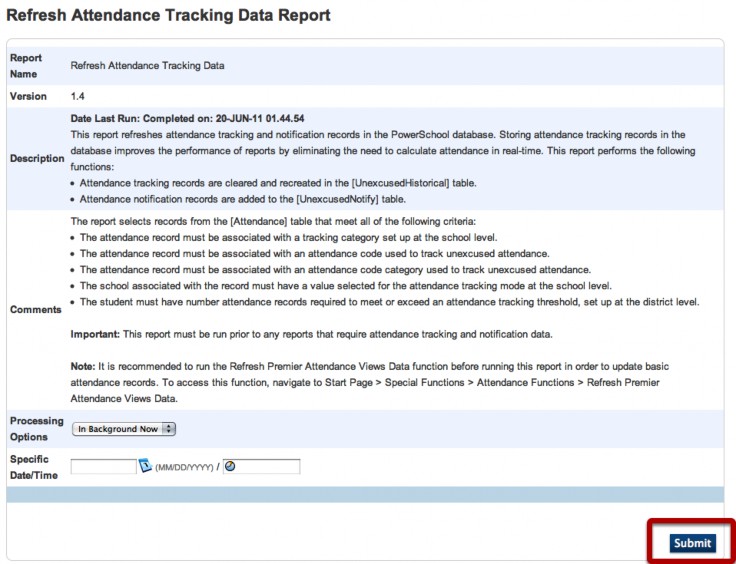
Step 4: Run Refresh Attendance Tracking Data
Open Refresh Attendance Tracking Data, select the appropriate processing option, and submit the report. Current PowerSchool documentation recommends refreshing Premier Attendance Views first when applicable. After completion, review the report output; a blank result file can indicate data problems that should be investigated before continuing.
Step 5: Return to the School Context
Leave the District Office context and select the school whose notifications you will process. Complete the remaining work separately for each school, following the district’s assigned responsibilities.
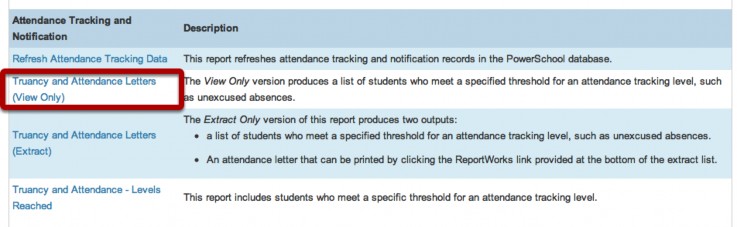
Step 6: Run Truancy and Attendance Letters—View Only
From System Reports in the school context, open the Truancy and Attendance Letters report and begin with the View Only option. This preview does not replace a careful review of the underlying attendance record.
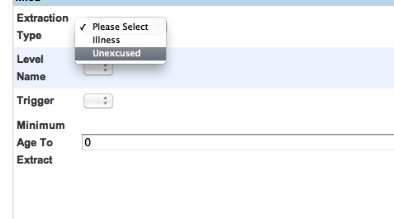
Step 7: Select the Extraction Type and Trigger Level
Select the district-approved extraction type, level name, and trigger. For the example workflow, begin with Level 1 and repeat the review-and-extract process for Levels 2 and 3.
Step 8: Review Every Student and Attendance Date
The preview may show no students for the selected level, as in this example:
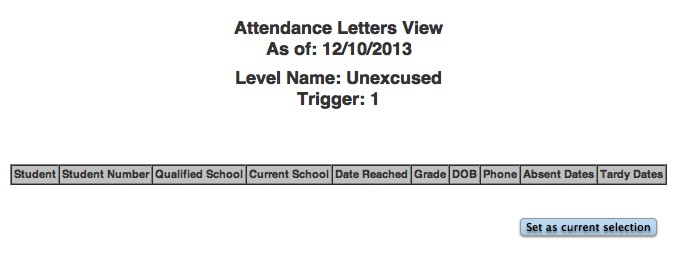
When students do appear, review each record before extracting it:
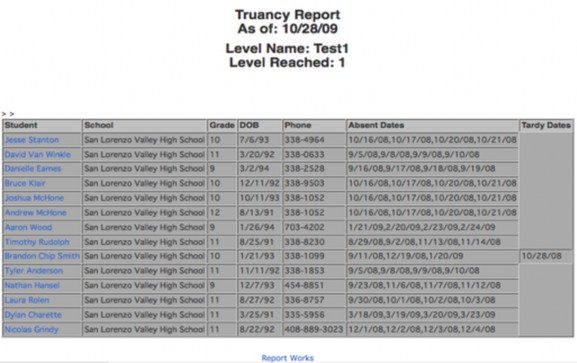
- Confirm the student, school, enrollment dates, and attendance dates.
- Resolve attendance entries that are incomplete, duplicated, miscoded, or awaiting verification.
- Confirm that the attendance codes qualify under current district configuration and policy.
- Check whether a notification has already been issued or whether an appeal or correction is pending.
- Use language-access and disability-access procedures required by the district.
Step 9: Run Truancy and Attendance Letters—Extract
Only after the preview has been verified should an authorized user run the Extract version for the selected level.
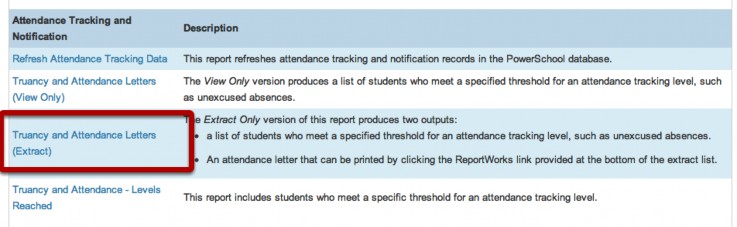
Step 10: Read the Confirmation Message
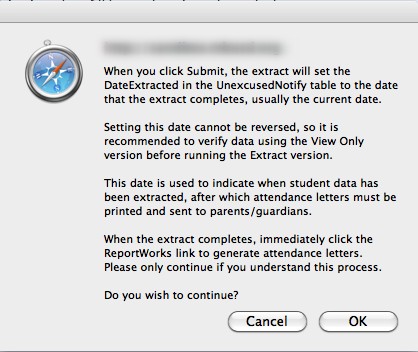
Confirm only when you are ready to create or “stamp” the notification records. This action can change which students appear in later report runs. If the list is incorrect, cancel and correct the attendance or configuration issue before proceeding.
Step 11: Open the District’s Letter-Generation Tool
The original workflow used ReportWorks. Your district may now use another PowerSchool report, form, document-management tool, or integration. Select the approved letter for the correct notification level.
Step 12: Generate, Review, and Deliver the Letter
- Verify the student and parent or guardian names, mailing address, attendance dates, school contact information, and required statutory statements.
- Use the district-approved current template; California’s required first-notice content changed effective July 1, 2025.
- Provide an accessible translation or interpretation according to legal and district requirements.
- Deliver the notice using the required method and document the date and method of delivery.
- Store or dispose of generated files according to student-record privacy and retention requirements.
Steps 13–14: Repeat for Later Notification Levels
Repeat Steps 6–12 for Level 2 and then Level 3, using the matching approved letter and intervention process. In the example configuration, those levels occur at 6 and 9 qualifying occurrences. Verify the district’s actual thresholds rather than assuming these values.
Later-level action should emphasize identifying barriers and connecting the student and family with appropriate supports. Conferences, School Attendance Review Board referrals, mediation, or involvement of outside agencies must be based on current law, district policy, individual circumstances, and the authorization of responsible district personnel.
Step 15: Close the Cycle and Schedule the Next Run
Confirm that each school completed its assigned review, extraction, letter generation, delivery, and documentation. Record any unresolved data issues and schedule the next coordinated cycle. The appropriate frequency—often weekly or monthly—depends on enrollment, attendance volume, staffing, and district procedures.
Current References
- PowerSchool: Attendance Tracking and Notification
- PowerSchool: Reports for Attendance Tracking
- PowerSchool: Refresh Attendance Tracking Data Report
- California Department of Education: Truancy
- California Department of Education: First Notification of Truancy
- California Attendance Guide: Terminology and Laws
Last reviewed and updated July 31, 2026. This operational guide is not legal advice. Confirm current California law, district policy, PowerSchool documentation, system configuration, and approved notice language before use.